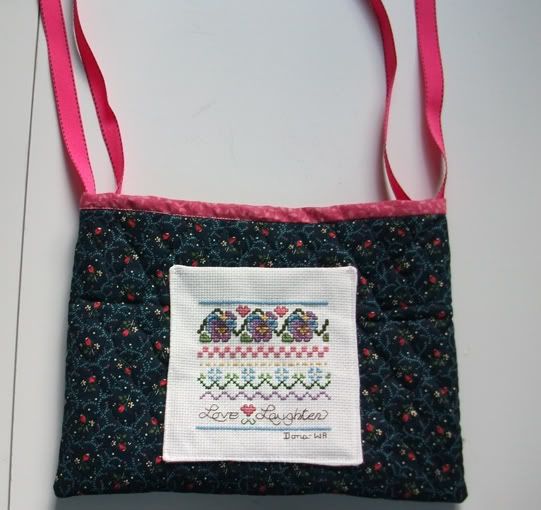
This is a tutorial on how I created the Wheelchair Arm Bag for World of Charity Stitching that fits between the person and the inside arm of the wheelchair. The original pattern is from Quiltwoman.com. Check out her great website for free patterns as well as lots of wonderful items to purchase.
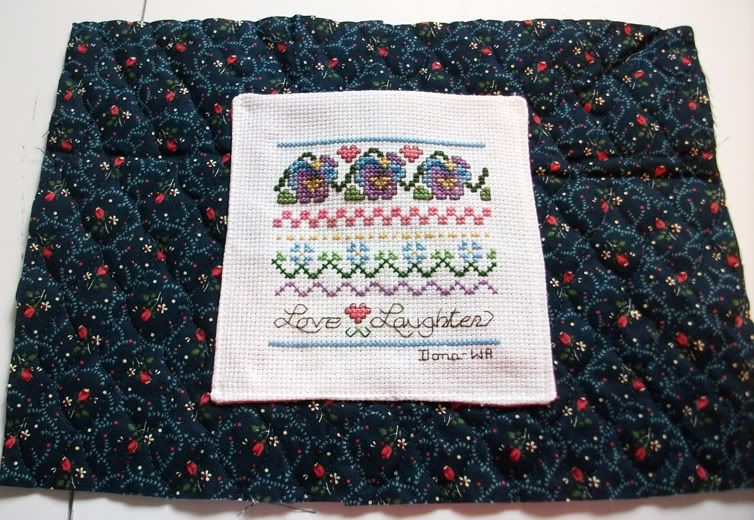
This Wheelchair Arm Bag is small and very easy to create and takes very little fabric. You can use any sturdy fabric for the outside. I used one-sided pre-quilted fabric and lined it with 100% cotton quilt fabric. I stitched the cross stitch I used for the pocket.
This Wheelchair Arm Bag is small and very easy to create and takes very little fabric. You can use any sturdy fabric for the outside. I used one-sided pre-quilted fabric and lined it with 100% cotton quilt fabric. I stitched the cross stitch I used for the pocket.
SUPPLIES NEEDED:
1. Sturdy fabric for front and back such as quilted fabric, denim, corduroy, decorator fabric etc. and cotton for the lining.
2. A finished cross stitch for the pocket3. I used grosgrain ribbon for the ties.
 CUT:
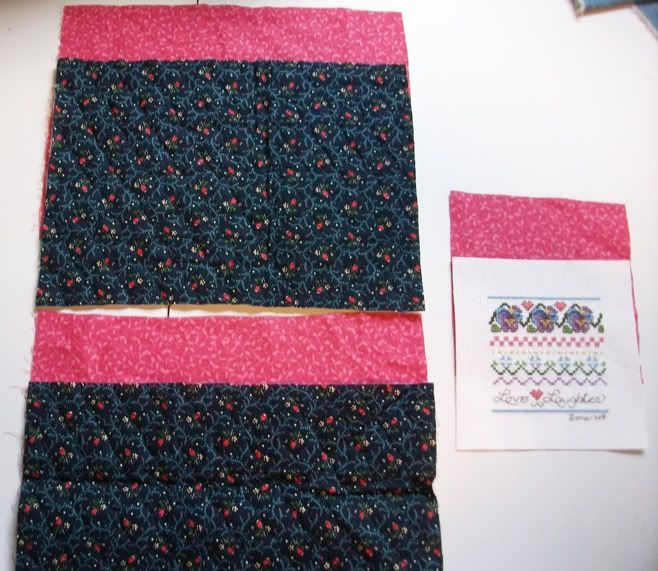
CUT:Cut 2 pieces 8x11" for front and back out of sturdy bag fabric.
Cut 2 pieces 8.5x11" for lining
Cut 1 piece of lining fabric the size of your cross stitch for pocket.
Cut 2 - 20" pieces of grosgrain ribbon (or your choice of tie material).
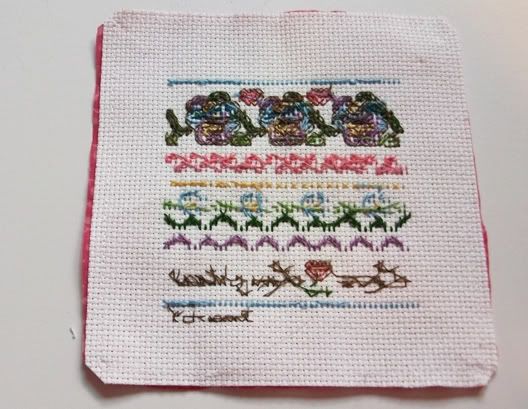
Cut your cross stitch piece to appropriate size for pocket. Lay the pocket lining right side up and place the cross stitch piece so right sides of lining & cross stitch piece are together. Stitch around the pocket leaving a place to turn at bottom. Turn pocket, poke out the corners so it's square. Iron the pocket turning in the opening at the bottom. No need to hand stitch shut as you will sew it to the front.
Take the front piece of bag fabric, pin the pocket in place and sew the pocket onto the front piece at the sides and bottom catching in the place where it was turned and leaving the top unstitched. Don't forget to reinforce both sides at top of pocket with extra stitches.

Sew a lining piece to the front and back at the top of your bag fabric.

together - see photos. The bag front & back will be together and the lining pieces will be together. Make sure your seam at the top is laying toward the lining and that sides at seam are matching. Stitch all around the lining and the bag fabric leaving a place for turning in the lining. Trim your corners. Don't trim the seam at the top.

Turn the bag right side out, pushing each corner out, and sew the opening closed in the lining.

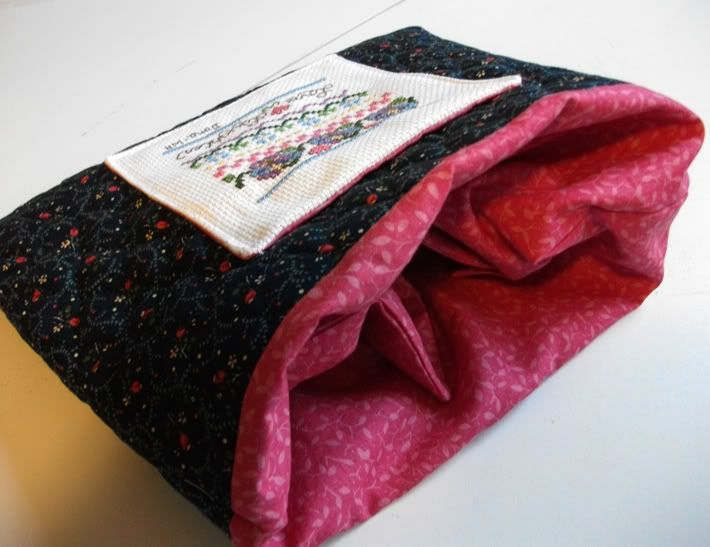 Now push the lining down into the bag.
 When in place, the lining should show on the outside of the bag at the very top to make a
decorative band around the top of the bag.

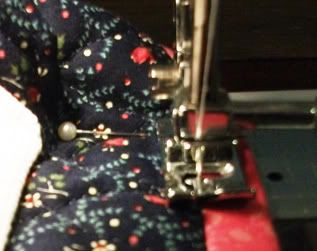
Pin in place and top stitch in the ditch of the seam that goes around the top.
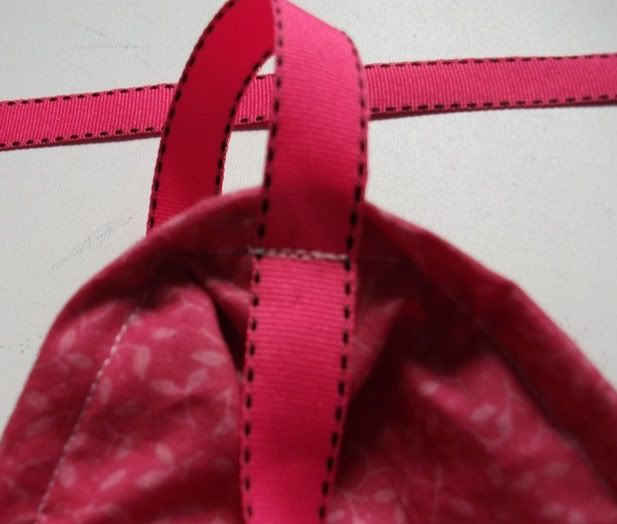
I used grosgrain ribbon for tieing the bag onto the arm of the wheelchair (figured satin ribbon would be too
slippery), but you can use anything that will tie it on nicely. I cut two pieces of ribbon about 20" long, folded it in half, and stitched it to the inside of the bag at the sides. Be sure to either fray check the ends of the ribbon or turn them under so they don't fray. You can also add velcro squares for a closure if you want to.